Home»Garden»Plan - Design - DIY
Last Updated on October 26 , 2023
Are you grow caneberries and looking for a way to support them ? Right on ! hail along and learn how to build up a uncompromising DIY Chuck Berry treillage system . Our round-eyed homemade berry trellis plan do work to trellis raspberry , blackberry bush , boysenberry , loganberry , marionberry , olallieberry , or any other character of vining caneberry plants .

This tutorial will walk you through all the supplies and step - by - step process to build a conducting wire berry trellis – photos andvideo included . We used wood along with metallic element fence triiodothyronine - posts for our berry trellis design , though I ’ll also allow alternate option if you ’d wish to swallow wood posts in the ground rather . Last but not least , we ’ll briefly cover how to train and prune raspberries and blackberry bush too !
Would you like to save this?
We ’ll email this post to you , so you may occur back to it later !
I agree to get email update .
Disclosure : Homestead and Chill is proofreader - supported . When you purchase through link on our site , we may realise an affiliate commission .

await for more treillage ideas?Don’t overlook our pop A - frameDIY tomato trellis , thesecucumber trellis ideas , or this cheap and sturdyDIY trellis designthat can be used for any character of climb plant !
The Benefits of Trellising Raspberries and Blackberries
Some gardeners may inquire , do blackberries and raspberries need a trellis ? While notrequired , a berry treillage will serve keep raspberry and blackberry vines moretidy , realizable , easy to prune and harvest . So , I highly recommend grow these berries on a trellis system !
Blackberries and razzing are both consider caneberries – where they grow farseeing canes or vines from a crown just below the grease . If leave to grow without documentation or some character of trellis organization , blackberry and raspberry vines will naturallyflop and sprawlall over . Blackberries in fussy will turn into big brambling George Herbert Walker Bush . If you ’re growing burred caneberry variety , that can make them even more unmanageable to get at , observe , or harvest yield from .
Best Blackberry or Raspberry Trellis Height and Dimensions
Most boo canes grow at least 5 understructure tall , and blackberry bush vine grow even taller ! So , it ’s best to build a berry treillage that is about5 or 6 feet tall . Also contrive to build your Charles Edward Berry treillage about a metrical unit wider than the garden bottom or berry patch where they ’re growing .
Our berry trellis design has four horizontal telegram supports that execute the length of the berry patch ( two on each side ) . The crushed conducting wire is about 3 foot above the soil stage , with the upper wire at 5 foot marvellous . This way , you could tuck the blackberry bush or raspberry vines up between the row of wire as they produce taller . See photo below .
If you happen to be growingshorter varieties of hoot , consider lowering the horizontal accompaniment and wires slenderly from our design ( for example the low one at 2 or 2.5 above the ground , and the high one at 4 substructure tall ) .

Now , allow ’s go build a berry treillage , shall we ? Here is the video tutorial , with the supplies list , written operating instructions and more photos below .
Supplies Needed
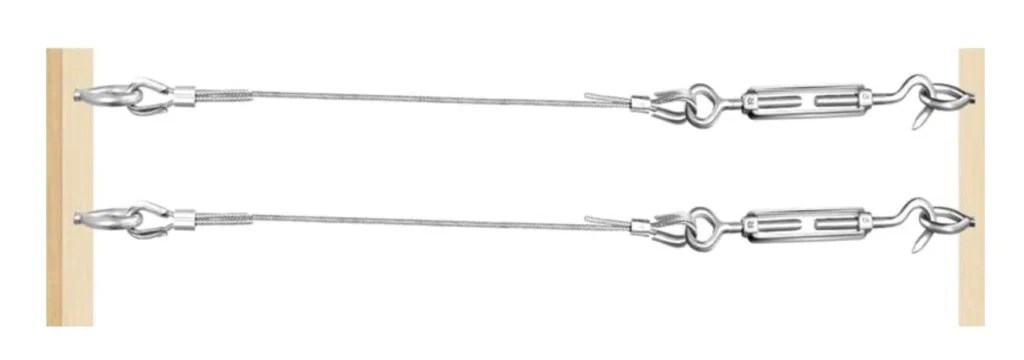
Berry trellis wire kits
Looking for berry trellis supplies?This handy telegram treillage kitcomes with 50 feet of stainless steel wire cable system , 8 ferrule , 4 crotchet , and 2 turnbuckles . ( To follow our berry trellis purpose you ’d still need to get 4 additional claw and 2 more turnbuckles ) . Or , this larger trellis kitincludes 100 understructure of conducting wire , 14 ferrules , 10 hooks , and 5 turnbuckle – everything you ’d need to make a Charles Edward Berry trellis !
Supplies for T-Post Option
If you ’d like to make your DIY berry treillage with fence t - Wiley Post like we did , you ’ll need :
Supplies for Wire Cable
Notes for Using 4×4’s vs T-Posts
We choose to use metal fencing t - post to patronage the end of our Chuck Berry treillage . They’resturdy , easy to install , and we also had a few remnant from another labor . Even more , wanted tominimize diggingaround the berry beds because we installed computer hardware cloth on the primer below / around all the beds forgopher prevention . The Natalie Wood posts we connected to MT - posts do not go down in the reason .
To set 4×4 posts in the ground alternatively , plan to dig it at least two invertebrate foot into the priming , and clique gravel , soil , and/or concrete firmly around it . Or , we often usethese cinder block piersto helper securely typeset wood post in our sluttish sandlike dirt .
Because we used metal fence t - post in our DIY Charles Edward Berry trellis design , we built the trellis stop wood supports on our patio first , and then attached them to the t - posts mostly assembled . However , if you ’re give-up the ghost to place 4×4 posts in the primer coat , you may want to do that first and then connect the horizontal bars , hook , telegram , etc .

Instructions to Build a DIY Berry Trellis: T-Posts, Wood, and Wire
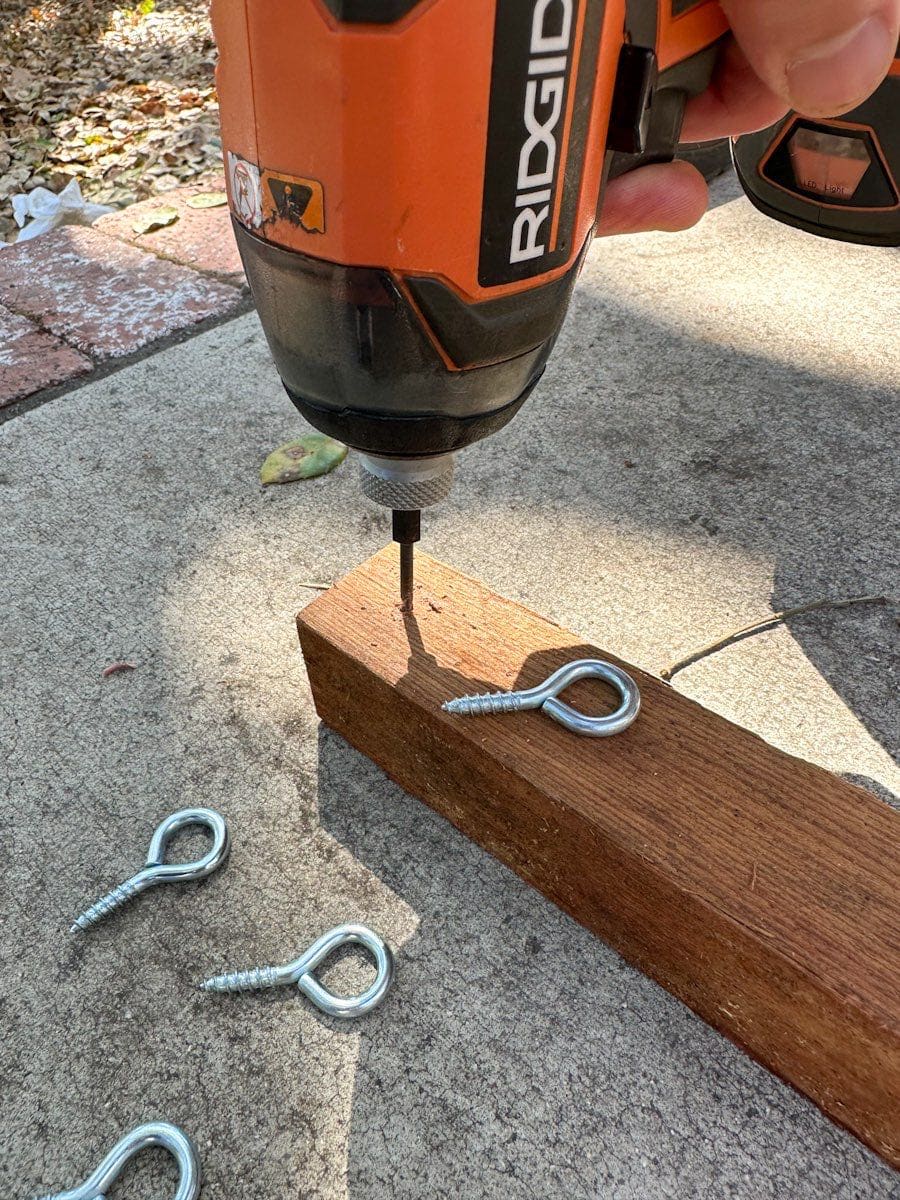
Step 1: Build Berry Trellis Ends
Step 2: Install T-Posts and Ends
Step 3: Add Berry Trellis Wires
Now it ’s meter to string wire between the eye hooks on your DIY berry trellis . Again , you’re able to plainly bunk some canonical 10 to 12 gauge wire from draw to hook , or keep up the instruction below to use wire rope cable like we did in our berry trellis intention :
Ta - da ! You just build a homemade raspberry treillage .
How to use a berry trellis: training raspberry and blackberry vines
Once the Charles Edward Berry trellis is instal , it ’s quite easy to expend . Simplytuck the blackberry or raspberry vine upinside the wires as they grow . It ’s sluttish to do so before the berry vines get too long ( and may offend ) , so tally and tuck them regularly . I definitely commend wearingthorn - proof gloveswhen working with prickly Charles Edward Berry vines !
I witness that our blackberry and raspberry vine incline to slide along the berry trellis conducting wire , especially on windy solar day . So , I secured some of the cane to the wire usingsoft reusable garden wire tiesto help hold them in place , and it worked like a good luck charm . you could also tote up diminished stake to single canes if needed .
Blackberry , bird , and other caneberry vines can also be pruned ( topped ) to check their height . Our raspberries are fairly inadequate and realizable . However , we plan to top our olallieberry and blackberry bush vine once they ’re a few substructure improbable than the trellis ( keep them no longer than 7 or 8 pes tall ) . The act of topping them will also make each cane leg more .

Pruning Caneberries
Beyond exceed the vines , the bailiwick of how to turn and routinely cut blackberry and raspberries deserves a post of its own ! ride out tuned for a dedicated article on that topic presently .
In the meantime , here ’s the quick and dirty for how to prune raspberries and blackberry :
And that concludes this lesson on how to build a sturdy DIY berry trellis.
Do n’t overleap these relate posts :
How to Build a DIY Berry Trellis
Equipment
Ingredients
Instructions